From a specific need to an integrated solution
Qt for Python (PySide2) provides Python bindings for Qt, which makes it relatively simple to create your own graphical user interfaces (GUI) with Python! However, whenever I’m trying to create an user-friendly data exploration experience in my projects, I feel quite limited with how much one can do (within a reasonable amount of time) with the available tools.
There are several options for integrating Python generated graphics into PySide2 applications. If your goal is to have straightfoward, simple Matplotlib generated figures at your GUI, just use the FigureCanvas class. If you want fast plotting of heavy data (say, realtime update of millions of points), you could go with PytGraph. If you want the beauty and interactivity if Plotly graphics, you could export the generated figure to html and import it in the PySide2 application using the QwebEngineView widget.
So far so good, but what if we want to go beyond single figures? What if we want to boost our GUIs with a sequence of plots, for example? With text? With interacting widgets? I bet you’re thinking the same thing I am at this point.. Jupyter notebooks!
We all know how great Jupyter notebooks are for making beautiful, interactive graphics and exploring data in storyline dashboards style. But, once you’re done producing your charming graphics and elegant control widgets, you face the most annoying limitation of a Jupyter notebook: it is a notebook, it basically operates in it’s own world. If you’re interested in static or semi-interactive graphics (zooming, show/hide data), that’s ok, you can just export your notebook to html and send it around, rendering it inside your GUI for example. However, if you need any level of interaction with a python backend, e.g. using Jupyter widgets, exporting the notebook won’t do the trick.
Enter Voila, a package that, in it’s own words: “turns Jupyter notebooks into standalone web applications. Unlike the usual HTML-converted notebooks, each user connecting to the Voilà tornado application gets a dedicated Jupyter kernel which can execute the callbacks to changes in Jupyter interactive widgets.”
Quite neat! It will render your interactive graphics + widgets in a web application (running on the browser), with the power of a Python kernel on the backend. Pretty much what I was looking for to include in my GUI projects! All I was left to do was to find a way to wrap the output of Voila within a Qt widget. And this is what I will describe here, the process of creation of QtVoila!
Base class: QWebEngineView
Voila renders its output as a web page, which is quite handy for many reasons. One of these is that we can now load it with QWebEngineView, a PySide2 widget that allows visualizing and interacting with web pages. The QtVoila class inherits from QWebEngine and extends it, let’s take a look at the first lines of code:
from PySide2 import QtCore
from PySide2.QtWebEngineWidgets import QWebEngineView
import nbformat as nbf
import numpy as np
import tempfile
import socket
import psutil
import os


class QtVoila(QWebEngineView):
    """
    QtVoila - A Qt for Python extension for Voila!
    """
    def __init__(self, parent=None, temp_dir=None,
                 external_notebook=None, strip_sources=True):
        super().__init__()
        self.parent = parent
        # Temporary folder path
        if temp_dir is None:
            self.temp_dir = tempfile.mkdtemp()
        else:
            self.temp_dir = temp_dir
        # Strip sources
        self.strip_sources = strip_sources
        # external_notebook option
        self.external_notebook = external_notebook
        # iternal_notebook option
        self.internal_notebook = nbf.v4.new_notebook()
        self.internal_notebook['cells'] = []
This starts importing the necessary modules and defining QtVoila as a subclass of QWebEngineView. It can be initialized with a parent object (the PySide2 application), a preferred path where to store temporarily created notebooks, a path to an existing notebook and the option to make Voila strip the code source when rendering the notebook or not. If no external notebook is used, an internal variable is created to contruct notebooks programmatically with nbformat.
Implemented methods
Now we need to create methods for QtVoila that will allow it to start, display and stop Voila processes, and create internal notebooks programmatically. Let’s look at the latter:
def add_notebook_cell(self, code_imports={}, code="", cell_type='code'):
    """
    Adds new cell to run on a Jupyter Notebook.

    Parameters:
    -----------
    code_imports: dict
        Key:Value pairs containing modules to be imported in this cell.
        Example: {'matplotlib': ['pyplot']}
    code: string
        String containing code to be run in this cell.
        Example: "pyplot.plot([1, 2, 3], [10, 15, 13])"
    cell_type: str
        'code' or 'markdown'
    """
    # Imports extension modules
    imports_code = ""
    for k, v in code_imports.items():
        if len(v) > 0:
            imports_code += "from " + k + " import " + ", ".join(v) + "\n"
        else:
            imports_code += "import " + k + "\n"
    code = imports_code + code
    # Make notebook cell
    if cell_type == 'code':
        new_cell = nbf.v4.new_code_cell(code)
    elif cell_type == 'markdown':
        new_cell = nbf.v4.new_markdown_cell(code)
    self.internal_notebook['cells'].append(new_cell)
The method add_notebook_cell() allows for code or markdown cells to be written and appended to the internal notebook. The argument code_imports receives a dictionary with modules to be imported in a code cell. The code argument receives a string with code to be run. These first two arguments are concatenated in a long string. Finally, the cell_type argument defines whether it is a python code or markdown text type of cell.
Each call of this method will append a new cell to the internal notebook, which allows us to create notebooks as long as desired. Next, we need to define the methods that will run the Voila process:
def run_voila(self):
    """Set up notebook and run it with a dedicated Voila thread."""
    # Stop any current Voila thread
    self.close_renderer()
    # Check for internal or external notebook
    if self.external_notebook is None:
        nbpath = os.path.join(self.temp_dir, 'temp_notebook.ipynb')
        nbf.write(self.internal_notebook, nbpath)
    else:
        nbpath = os.path.join(self.temp_dir, self.external_notebook)
    # Run instance of Voila with the just saved .ipynb file
    self.voilathread = VoilaThread(parent=self, nbpath=nbpath)
    self.voilathread.start()
    # Load Voila instance on main Widget
    self.update_html(url='http://localhost:' + str(self.voilathread.port))

def update_html(self, url):
    """Loads temporary HTML file and render it."""
    self.load(QtCore.QUrl(url))
    self.show()

def close_renderer(self):
    """Close current renderer"""
    if hasattr(self, 'voilathread'):
        # Stop Voila thread
        self.voilathread.stop()
Whenever called, the run_voila() method will check for any running similar thread and kill it through the method close_renderer(). Next it will check for a notebook to be rendered, whether internal or external, and evoke a Voila process using an auxiliary class VoilaThread. The update_html() method will load the notebook being rendered at the Voila output url, which in our case is the localhost.
Running a separate Thread for Voila processes
What Voila does is to start a Python process behind the scenes and run your notebook there. The Python process is alive as long as Voila is running, that’s what makes it possible, for example, the interaction between Jupyter widgets and any generated graphics. And that’s why it is also a good idea to run it in a separate thread, so if anything goes wrong with Voila (or with the code you submitted to it) your GUI won’t break along with it.
To create a separate thread with PySide2 all it takes it to create a class that inherits from Qthread. Let’s take a look:
class VoilaThread(QtCore.QThread):
    def __init__(self, parent, nbpath, port=None):
        super().__init__()
        self.parent = parent
        self.nbpath = nbpath
        if port is None:
            self.get_free_port()
        else:
            self.port = port

    def run(self):
        os.system("voila " + self.nbpath + " --no-browser --port " + str(self.port)
                  + " --strip_sources=" + str(self.parent.strip_sources))

    def get_free_port(self):
        """Searches for a random free port number."""
        not_free = True
        while not_free:
            port = np.random.randint(7000, 7999)
            with socket.socket(socket.AF_INET, socket.SOCK_STREAM) as sock:
                res = sock.connect_ex(('localhost', port))
                if res != 0:
                    not_free = False
        self.port = port

    def stop(self):
        pid = os.getpid()
        process = psutil.Process(pid)
        for child in process.children(recursive=True):
            if child.status() != 'terminated':
                child.kill()
Once this class is instantiated, it will automatically search for an available port on which expose the Voila process. The start() method inherited from QThread (and used by the run_voila() method) will also call the defined run() method, which starts the Voila process with the specific arguments for port number and strip sources. The Voila process can be terminated with the method stop().
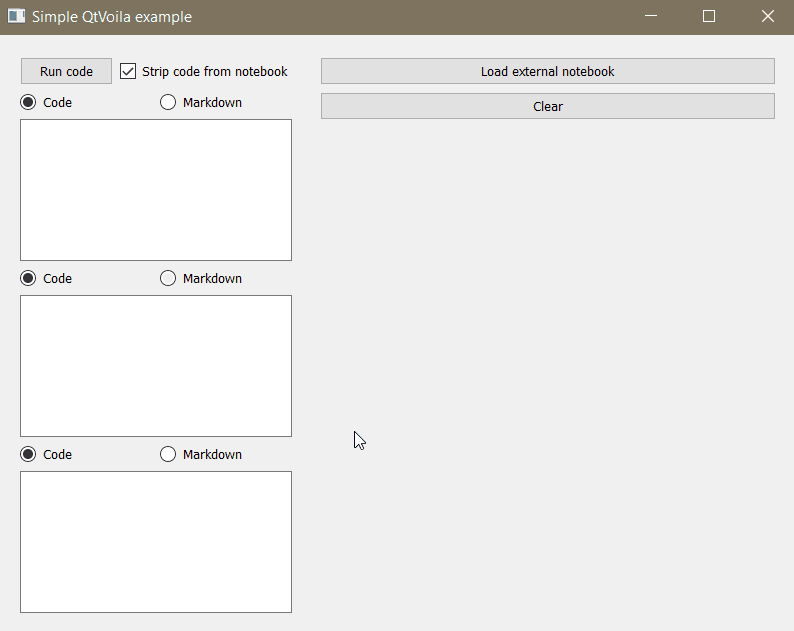
Using QtVoila
You can find some examples on how to use QtVoila in your PySide2 application in here. For example, creating notebooks from user’s input and rendering them:

To have your GUI importing existing notebooks and rendering them:
Conclusions and final words
GUIs are a very important part for full-fledged applications and PySide2 makes it simple to create them with Python. All the creative potential of Python graphical libraries, from Matplotlib to Plotly, can be easily integrated in PySide2 applications, but that potential is only truly capitalized by Jupyter notebooks, where a Python kernel runs in the background and allows for user-interactive widgets and code processing. Voila brings the power of notebooks to standalone web applications and QtVoila bridges it with PySide2.
In the immense world of software for data analysis, where there are a thousand intermediate solutions to any given problem, you might find yourself lacking just the right thing for your needs. And that’s when need becomes opportunity for creativity! I know how discouraging it can be, though, to meet with well stablished projects much bigger than anything you’ve ever done, stare at hundreds of thousands of lines of code already implemented and maintained by professional programmers more experienced than you.
I hope this post can serve as encouragement for people that meet these circumstances and are pondering whether they should put the effort at all. Around 120 lines of code was all it took to write this tool, to implement the solution I needed for my projects and contribute to the community of developers. I hope you feel motivated to engage in your personal projects and that this post will help someone to learn a bit more of Python.
Finally, feel welcomed to use, change and collaborate with QtVoila!
References
QtVoila
Qt for Python
Jupyter
Voila
nbformat
Jupyter widgets
Matplotlib
PytGraph
Plotly